Tag Archives: solaris

2012 Calendar vs 1752 Calendar in Unix and Leap Years

Happy Ground Hog Day all! This February is the month that gets an extra day added during the leap year of 2012. The Unix ‘cal’ command in Solaris 10 will show you how things can get screwed up if the leap days aren’t added to the calendar every 4 years.

 sunbox% cal 9 1752
 September 1752
 S  M Tu  W Th  F  S
       1  2 14 15 16
17 18 19 20 21 22 23
24 25 26 27 28 29 30

Notice anything missing? The calendar we use today had September 1752 adjusted by the British after changing from the Julian calendar to the Gregorian calendar. And you thought changing to a new operating system can create havoc!

From the cal manpage in Solaris 10:

NOTES
An unusual calendar is printed for September 1752. That is
the month 11 days were skipped to make up for lack of leap
year adjustments. To see this calendar, type:

cal 9 1752

If you want to see the calendar for the current month and year, just type cal.

Type cal 3 2012 to see the calendar for March 2012. If you just type cal 3, you will see the full 12 month calendar for the year 3. 2009 years ago, way before Unix Time.Type cal 2012 in the Unix command terminal and you’ll get the full 12 month calendar for the year 2012.
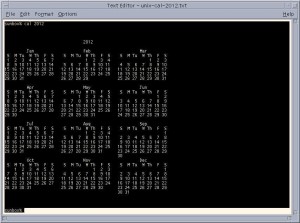
unix-cal-2012-black-binary
Unix command cal 2012 in Solaris

Solaris 10 UNIX /var/audit logs full, workstation not responding…

So you have a UNIX system admin emergency:  A Solaris 10 workstation that was working and running is suddenly frozen and unresponsive.

Suspected culprit? Audit logs. If they have filled up and no other actions can be logged, all processes and attempted logins are stopped.

It is possible to get back into the frozen UNIX workstation and restore normal operation with a few steps:

Hit Stop-A to get to the Solaris OpenBoot PROM OK prompt. *

At the OpenBoot prompt, login to command mode with the firmware password if you have one set. (You should if you are worried about audit logs)

Type boot-s  to boot into single user mode. You’ll need the firmware and root password.

Run a df –h to see what is mounted. If /var/audit is not mounted, the partition is probably full.

Find the entry in your /etc/vfstab file for the disk device that contains /var/audit.

Mount the disk device (not the raw rdsk device) using the mount command with your disk device name such as:

mount /dev/dsk/c1t0d0s7 /var/audit

Run a df –h again just for a sanity check. /var/audit should show as mounted and at 100% capacity.

Change directory to /var/audit and run gzip on the largest audit files or move them according to your local security policy.

After gzip compression completes, (this may take a while if the files are large) run df –h again to check that /var/audit is under 80% capacity or so.

A test compression on the binary audit files using gzip on my system dropped the /var/audit partition from 100% to 5% capacity. Your results may vary.

While still in single user mode, type init 6 to reboot and go back to normal multi-user mode. All your normal drive partitions and network devices should be mounted and available.

*This works on Solaris SPARC machines, x86 machines have no built-in Open Boot PROM so you must use GRUB or other boot loader to boot to single user mode.